Adding files to a shared Google Drive sounds straightforward until permissions, folder placement, and version control get in the way. This guide explains how to add to a shared google drive without breaking access rules, losing track of uploads, or cluttering a team folder with duplicate versions.
What you need to know before you upload
- Shared folders and shared drives behave differently, so the right upload method depends on where the team stores files.
- The fastest desktop route is usually Google Drive in a browser or Drive for desktop for larger files.
- On a phone or tablet, uploads work too, but you should always confirm the final destination folder.
- If you cannot upload, the cause is usually insufficient access rather than a broken file.
- For video, design, and other heavy media, a tidy naming system matters almost as much as the upload itself.
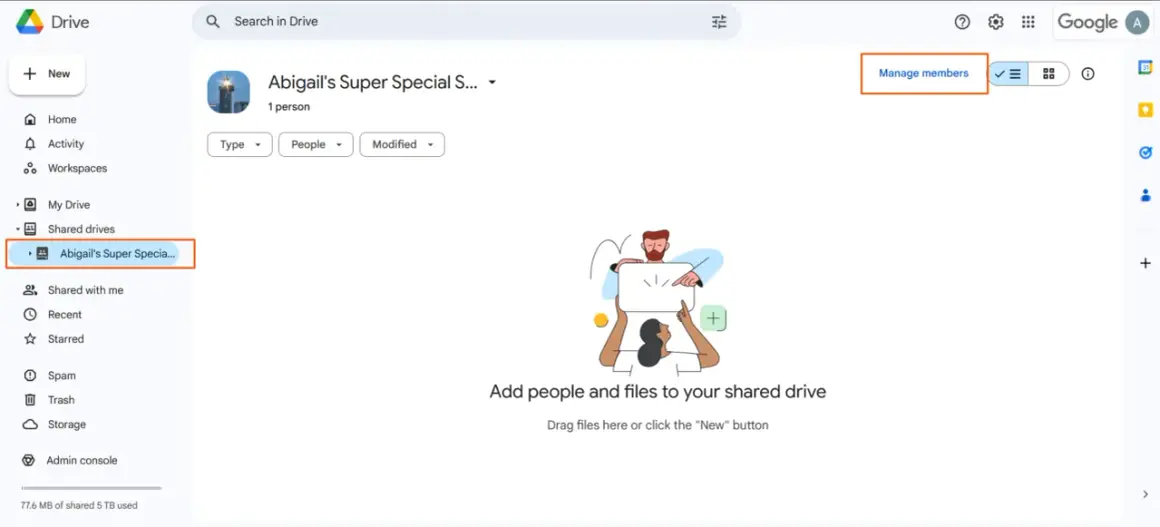
Know which kind of shared space you are using
The first thing I check is whether I am dealing with a shared folder inside My Drive or a proper shared drive in Google Workspace. The two look similar at a glance, but they are not the same workflow. A shared folder is usually enough for a small review loop or a client hand-off, while a shared drive is better when a team needs durable ownership and long-term collaboration.| Shared space | Access needed to add files | What happens to the file | Best use case |
|---|---|---|---|
| Shared folder in My Drive | Edit access to the folder | The file sits in that folder and follows the folder’s sharing rules | Short-term collaboration, feedback folders, client review spaces |
| Shared drive | Contributor or higher | The file is team-owned and stays behind if a member leaves | Ongoing projects, agency work, production archives |
| Private folder with a link | No upload access unless edit rights are granted | People can view the link, but they cannot add files by default | Reference only, not collaboration |
That distinction matters because the upload button can be visible while the folder still rejects your file. If you understand the container first, the rest becomes much easier. Next I’ll show the cleanest way to upload from a computer, which is still the most reliable route for most people.
The cleanest way to upload from a computer
For most teams, I would start on desktop. It is easier to verify the destination, easier to rename files before they go live, and far less frustrating when you are handling folders of footage, graphics, or exports. You can upload directly in the browser, drag files into the window, or use Drive for desktop if you prefer working from Finder or File Explorer.
Use the browser when you need a quick upload
- Open Google Drive in your browser and go to the shared folder or shared drive.
- Make sure you are inside the destination folder before you upload anything.
- Click New, then choose File upload or Folder upload.
- Select the file or folder from your computer and wait for the upload to finish.
- Refresh the folder if needed and confirm the file appears where it should.
Use Drive for desktop for larger media files
When the files are big, I prefer Google Drive for desktop. It keeps the upload flow tied to a normal local folder, which is less clumsy for long-form video, image sequences, or exported review files. In practice, it is the better option when you are moving a lot of media and do not want to keep a browser tab open the whole time.
- Install Drive for desktop and sign in with the correct account.
- Open the Google Drive folder that appears on your computer.
- Drag your files or folders into the destination shared drive or shared folder.
- Let the sync complete before closing the app or powering down the machine.
For creative teams, this is the method that tends to save the most time. It reduces the number of steps between your project folder and the cloud, which matters when you are moving repeated exports every day. Mobile works too, but the workflow is a little different.
Uploading from a phone or tablet without losing the file path
Mobile uploads are useful when you need to share a photo, a clip, or a document away from your desk. They are also the easiest place to make a small mistake, because the app may not always make the final destination obvious. I always recommend checking the location before you tap upload, especially if the folder is shared across a team.On iPhone and iPad, the Drive app lets you choose the destination folder during the upload flow. That makes it fairly direct: open the app, choose File upload, pick the file, select the location, and confirm. On Android, the process is also simple, but I still check the resulting folder afterwards because uploads can land in My Drive first and then need to be moved into the shared space.
For video files, Wi-Fi is the safer choice. It is not just about speed; it is also about avoiding interrupted uploads when the file is large. If you are sending a quick review clip or a compressed social export, mobile is fine. For camera originals or heavier edits, I would still use a computer whenever possible. Once the device is sorted, the real gatekeeper is permissions.Permissions that decide whether the upload will work
Most upload problems I see are not technical problems at all. They are access problems. Someone has a link, but not the right role. Someone can view a folder, but not add to it. Or the team is working in a shared drive while the uploader only has read access. If the button is there but the file will not stick, permissions are the first place I look.
| Role or access level | Can add files | Typical use |
|---|---|---|
| Viewer | No | Read-only access for review |
| Commenter | No | Feedback without changing files |
| Editor on a shared folder | Yes | Standard collaboration in a shared folder |
| Contributor in a shared drive | Yes | Adding content to a team-owned drive |
| Content manager or Manager | Yes | Uploading plus organising, deleting, and controlling structure |
If you manage a team, I prefer sharing folders through a Google Group instead of adding people one by one. When someone joins or leaves the group, access changes with them, which keeps admin work under control. In a work or school account, that is often the cleanest way to manage recurring collaborators. Once the access layer is stable, the next job is avoiding the mistakes that create clutter later.
The mistakes I see most often
The biggest upload mistakes are usually boring ones, which is exactly why they keep happening. People upload to the wrong place, leave the file in My Drive, or drop in a new version with a filename that tells nobody what changed. In a busy production workflow, that sort of thing wastes more time than a failed upload ever will.
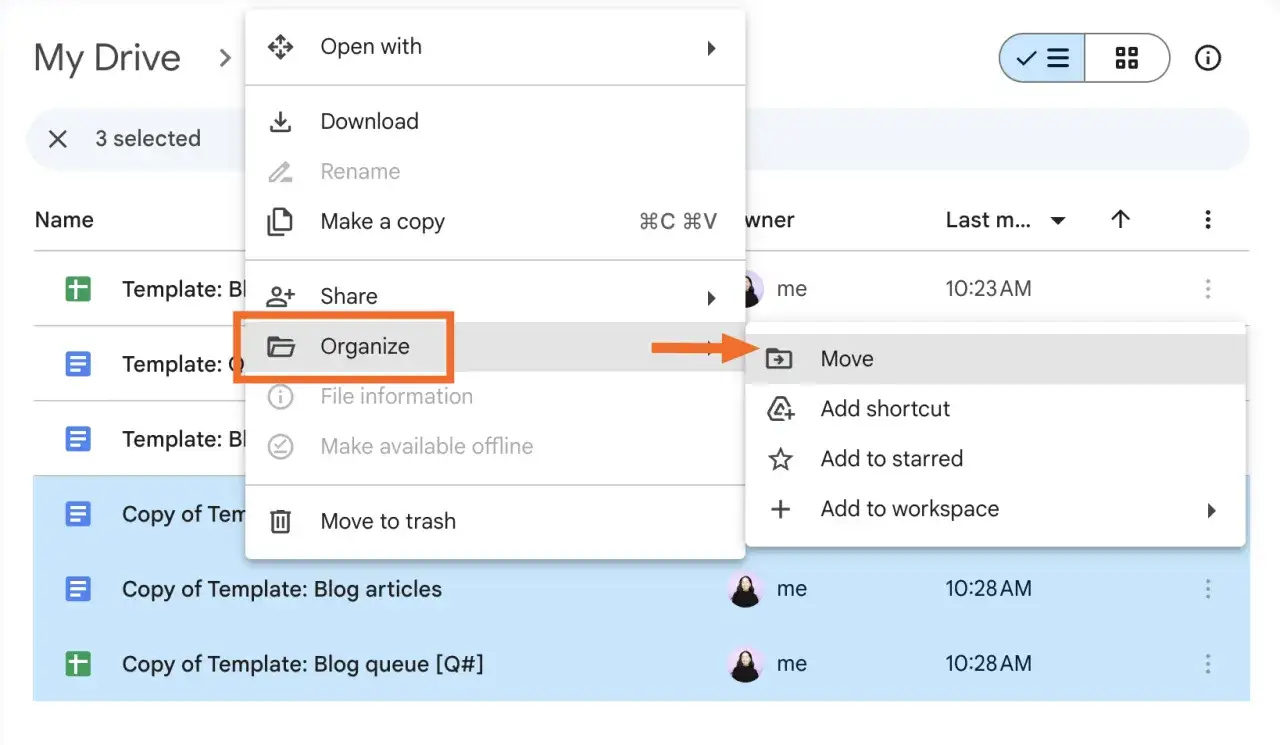
- Uploading to My Drive by accident and forgetting to move the file into the shared folder or shared drive.
- Using vague names like final.mp4 or export_new.mp4, which tells the team almost nothing.
- Overwriting version history unintentionally when a same-name file is uploaded and Drive turns it into a revision.
- Giving the wrong access level to a client or collaborator, then wondering why they cannot upload.
- Ignoring folder structure and mixing raw files, review copies, and final exports in one place.
There is one more detail worth remembering: if something is deleted from a shared drive’s trash, it can disappear permanently after 30 days. That is a long enough window to create false confidence, but short enough that I would not rely on it as a backup plan. Better to keep a clear folder structure and use meaningful filenames from the start. That matters even more when the files are part of a video project.
A practical workflow for video teams that share a lot of files
Because this site focuses on digital media and video work, I want to make the workflow concrete. When I am dealing with footage, review exports, thumbnails, subtitles, or motion graphics, I do not treat the shared drive as a dump box. I treat it as the project’s active working space.
My default setup is simple: one top-level folder for raw footage, one for proxies, one for review exports, one for final deliverables, and one for supporting assets like music, graphics, or captions. If the job is ongoing and multiple people will touch it, I prefer a shared drive. If it is a short approval round, a shared folder is often enough.
For naming, I keep it readable and specific: project name, deliverable type, version, and date if needed. That way, when a producer asks for the latest cut, nobody has to guess which file is the newest one. It also makes the browser preview and search tools far more useful, which is a small win until you are juggling twenty files at once.
The last habit I recommend is to upload the file, check it in the target folder, and then send the link only after you have confirmed the permission level. That small check prevents most of the confusion people blame on Google Drive. In reality, a clean upload workflow usually comes down to three things: the right folder, the right role, and a filename that actually helps the team.