Backing up Google Photos to an external hard drive is mostly a matter of getting the sequence right. The practical answer to how to transfer Google Photos to an external hard drive is to export a copy first, verify it on your computer, and only then copy it to the drive. In 2026, that is still the cleanest way to protect the library without losing metadata or deleting the wrong version.
These are the essentials before you copy anything
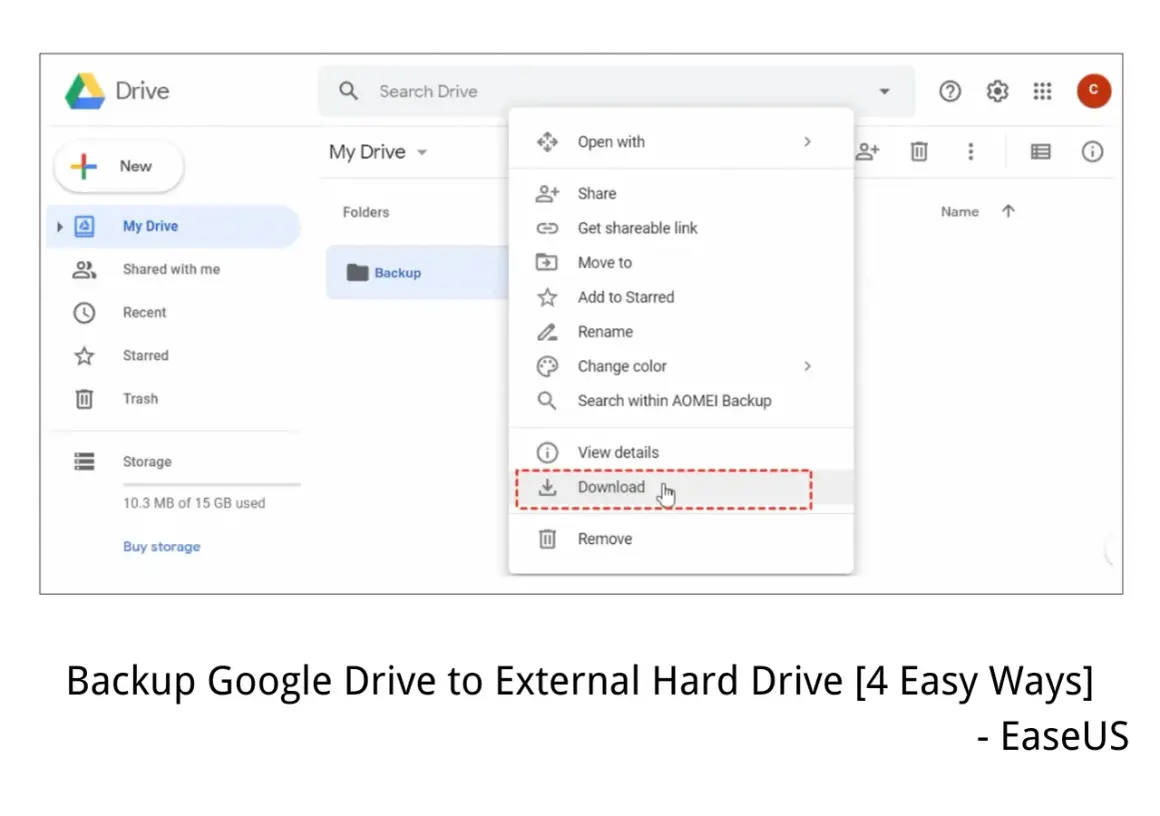
- Use the direct Google Photos download for a small batch, or Google Takeout for a full export, then copy the extracted files to the drive.
- Google keeps the originals in your account after export, so you can check the backup before making any deletion decisions.
- Large Takeout archives can be split into multiple files, and the download link usually expires after about 7 days.
- Keep the JSON sidecar files if you want captions, comments, and extra metadata to travel with the photos.
- If your library includes videos, make sure the external drive has enough space and is formatted for large files.
Why this is a two-step job
Google Photos is cloud-first, while an external hard drive is local storage, so there is no true one-click move from one to the other. What you get instead is an export or download, which means you are creating a copy on your computer before placing it on the drive. That matters because it keeps the cloud version intact until you know the backup is complete.
I treat this as a simple rule: export, verify, copy, then decide whether to delete. Once you work that way, the process becomes much less stressful, and you avoid the common mistake of clearing the cloud library before the archive has been checked. The next step is choosing the right export route for the size of your library.
Choose the export route that matches your library
| Situation | Best route | Why I’d use it |
|---|---|---|
| A few photos or one short video | Download directly from Google Photos | Fast, simple, and no archive to unpack |
| One album or a handful of albums | Google Takeout with album selection | Good balance between control and scale |
| An entire library | Google Takeout with a larger archive size | Best for bulk backups and metadata preservation |
For a small batch, the direct download route is enough: open Google Photos in a browser, select the items, use the More menu, and download them to your computer. For anything larger, I would switch to Takeout immediately. It avoids the repetitive clicking that makes people rush the job, and rushed backups are where most mistakes start. Once the route is chosen, the actual export is straightforward.
Export the library with Google Takeout
If you want a proper backup of a whole photo history, this is the route I trust most. Start in Google Takeout, select Google Photos, and narrow the export to the albums you actually want if you do not need everything. That is useful when you are separating family photos from work material, or when you only want a specific year or trip.
- Open Google Takeout and select Google Photos.
- Use the album picker to deselect anything you do not want.
- Choose a delivery method. The email download link is usually the cleanest choice if your final destination is an external drive.
- Select an archive size. I usually choose 50 GB for large libraries because Google notes that larger exports can be split into multiple files.
- Create the export and wait for the email link. Depending on the size of the account, the archive can arrive in minutes or take a few days.
- Download every archive file before moving on. The link typically expires in about 7 days, so I never leave this step hanging.
If the archive is large, do not panic when you see more than one ZIP or TGZ file. That is normal. If you get the choice, ZIP is easier on most computers; TGZ can work fine too, but it may need extra unpacking software on Windows. After the archive lands on your computer, the next thing worth checking is what is actually inside it.
Keep the archive readable, not just downloaded
| What you get | What to expect | Why it matters |
|---|---|---|
| Photos | JPG, PNG, GIF, WEBP, AVIF, and most RAW files | Most common image formats are covered |
| Videos | MP4, MOV, M4V, MKV and other common formats | Useful if your library is video-heavy |
| Metadata | Original timestamps remain embedded, but your computer may show a fresh file date | Do not judge the backup by modified dates alone |
| Google-specific extras | Captions, comments, and similar data may arrive in JSON sidecar files | Keep those files with the media files |
This is where people often misread a good export as a bad one. A photo can look “new” on your desktop because the operating system stamps it at download time, even though the original metadata is still inside the file. Google also says unsupported photo and video files will not transfer, so I always spot-check a few older items after the download, especially if the library includes RAW shots or unusual camera formats. With that in mind, copying to an external drive becomes a simple file-management task.
Copy the files to an external hard drive
Once the export is on your computer, the final copy is straightforward. Plug in the external drive, open the downloaded archive folder, and copy the extracted Google Photos files across using Finder on a Mac or File Explorer on Windows. I prefer copying the extracted folders rather than leaving the whole backup trapped inside a ZIP, because it is easier to browse later and simpler to test.
- Unzip or unpack the archive on your computer first.
- Create one top-level folder on the external drive, such as Google Photos Backup.
- Copy the extracted folders into that directory, not into random locations on the drive.
- If you need the drive to work on both Windows and macOS, exFAT is usually the least painful format for cross-platform use.
- After the copy finishes, open a few sample photos and videos directly from the drive.
- Use safe eject before unplugging it.
The mistakes that cause the most grief
- Deleting the Google Photos originals before the external copy has been checked.
- Ignoring split archives and assuming one downloaded file means the job is done.
- Throwing away the JSON sidecar files, which can remove captions and extra metadata.
- Trusting modified dates instead of opening real files.
- Forgetting that the download link expires after about 7 days.
My rule is simple: if the backup is important enough to copy, it is important enough to verify. If the archive fails halfway through, create a fresh export instead of trying to force a flaky one into working. A five-minute spot check now is cheaper than rebuilding a lost archive later, and that leads neatly into the routine I would actually trust.
A backup routine I would actually trust
For anything I would hate to lose, I would keep three layers for a short period: the Google Photos library, the downloaded archive on the computer, and the copied folder on the external drive. Once I have opened random samples from the drive and confirmed the folder structure makes sense, I can decide whether the cloud copy still needs to stay. If the goal is only extra safety, I leave both copies in place.
- Keep the archive for at least a week before deleting anything from Google Photos.
- Retain the ZIP or TGZ files until you are sure every folder copied cleanly.
- Store the external drive somewhere separate from your laptop or desktop.
- Run the same export routine again whenever the library has changed enough to justify a fresh offline copy.
That is the cleanest way I know to move Google Photos into local storage without turning the process into a gamble. Once the first backup is working, the same method scales neatly for future exports.