Live video fails less often because of one bad number than because several small choices fight each other. Resolution, frame rate, bitrate, encoder load and latency all have to fit the same broadcast path, especially when you are pushing from a UK home connection that looks generous on paper but still wobbles at busy times. The best streaming settings are rarely the highest numbers; they are the ones your connection can carry without strain. This guide breaks down the practical choices I would start with, how I decide between them, and the trade-offs that matter most when you want a stream to feel clean instead of merely technically live.
The core decisions that make a live stream feel stable
- The best streaming settings depend on the platform, your upload headroom and how much motion is in the scene.
- For most creators, a stable 1080p30 or 720p60 stream beats an unstable 1080p60.
- CBR, a 2-second keyframe interval and clean stereo audio solve most setup issues.
- Lower latency improves interaction, but it also raises buffering risk.
- I would test with real movement, not a frozen desktop, before going live.
What the main controls actually do
I start with the basics because most confusion comes from mixing up what each control is responsible for. Resolution defines how much detail you are asking the encoder to carry. Frame rate defines how many moments per second the stream has to describe. Bitrate is the budget that pays for both of those choices. If any one of them is out of proportion, the whole stream begins to look soft, blocky or unstable.
In practice, I think of bitrate as the budget and frame rate as how many times per second that budget gets spent. A talking-head stream at 30 fps can look crisp with modest bandwidth because the image does not change much. Fast gameplay, sports, dance, or a live demo with lots of motion needs more data to stay clean. That is why a higher number on one setting is not automatically a better result.
- Resolution affects readability. Higher resolution helps text and fine detail, but only if the bitrate can support it.
- Frame rate affects motion. 60 fps feels smoother for games and action; 30 fps is often enough for presentations, interviews and webinars.
- Bitrate affects compression quality. Too low, and you get banding, mud and macro-blocking; too high, and you risk dropping frames if your uplink cannot hold it.
- Encoder choice affects efficiency. CPU-based x264 can look excellent, but hardware encoders such as NVENC, Quick Sync and AMF usually protect system stability better.
- Keyframe interval affects compatibility. A 2-second interval is the safest live baseline for most platforms.
- Audio settings matter more than many people expect. Clean stereo audio at a sensible sample rate will do more for perceived quality than an extra bump in video bitrate.
Once those roles are clear, the next step is choosing a baseline that will not fight your hardware.
A sensible starter setup for most creators
If I had to build a first profile for someone streaming from the UK, I would start with stability and work upward only after the test stream survives without dropped frames. UK fibre can be fast, but household congestion, Wi-Fi noise and evening traffic still matter. I would rather run a slightly conservative profile and keep 20-30% upload headroom than squeeze every last megabit out of the line.
| Use case | Practical starting point | Why I would use it |
|---|---|---|
| Talking head, podcast, webinar | 1080p30 at 4-6 Mbps | Faces, slides and text stay sharp without wasting bits on unnecessary motion. |
| Tutorials and screen sharing | 1080p30 at 4-6 Mbps | Readable UI matters more than motion smoothness, so 30 fps is usually enough. |
| Fast-paced gaming | 720p60 at 4.5-6 Mbps or 1080p60 at 6-8 Mbps if the upload is strong | 60 fps keeps movement fluid, but only if the scene is not crushing the bitrate. |
| Multicam or event coverage | 1080p30 at 6-8 Mbps | It is easier to hold a stable live feed than to force every source into a heavy 60 fps encode. |
For a first live test, I would not chase 1440p or 4K unless the content truly benefits from it and the entire chain has been proven stable. A clean 1080p30 stream often looks more professional than a fragile high-resolution stream that drops frames whenever the scene becomes busy. That baseline still needs the right encoder behaviour, which is where the next decisions start to matter.
How I choose the encoder and bitrate
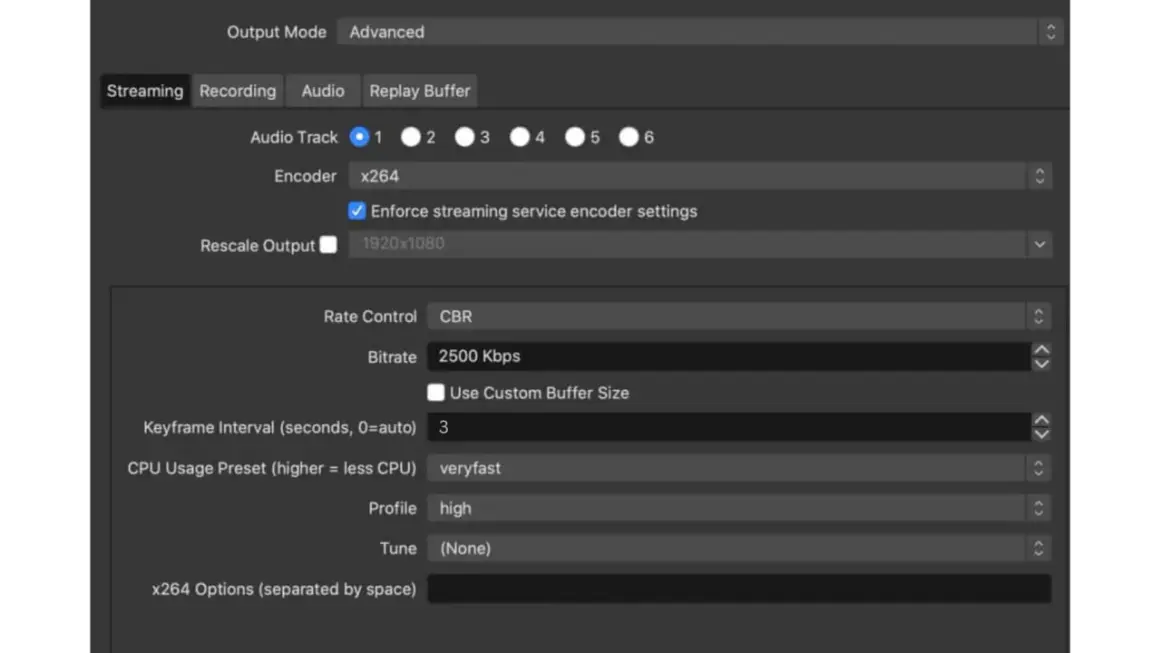
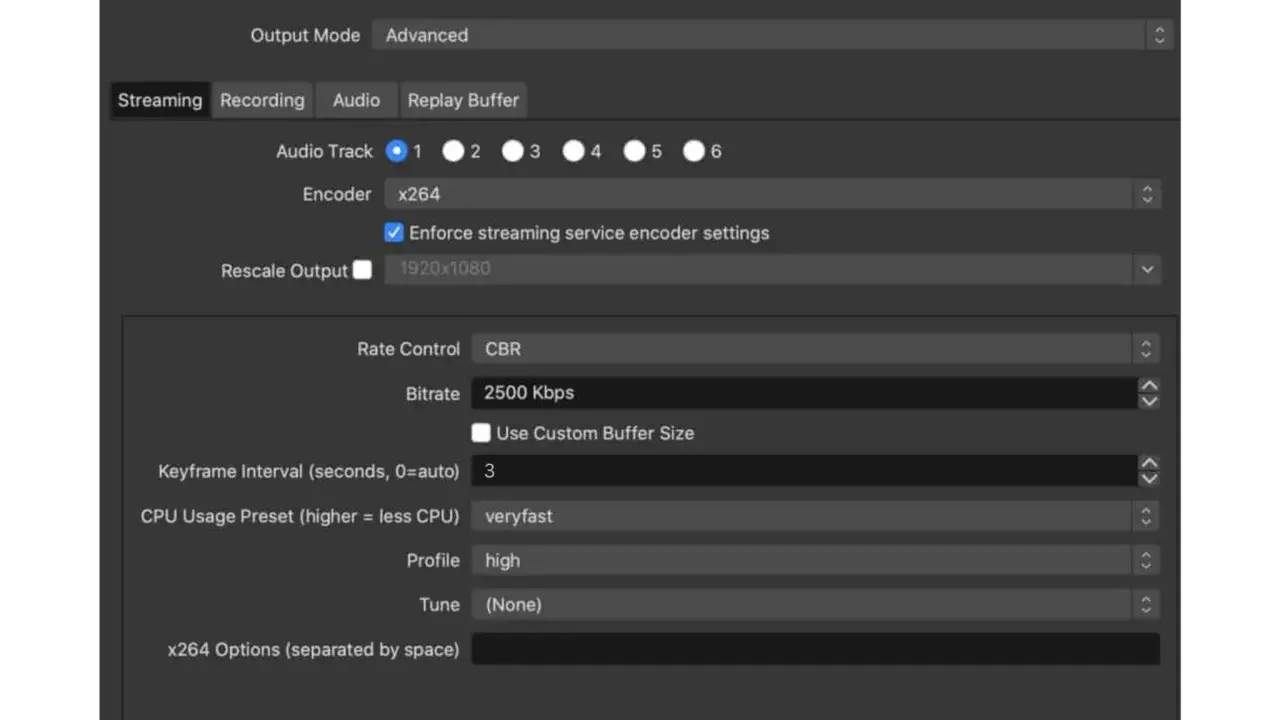
If the encoder is wrong, no amount of scene polish will rescue the stream. For live delivery, I prefer CBR because it sends a steady data rate that platforms and viewers handle more predictably. Variable bitrate can work in other workflows, but in live broadcasting it tends to create the wrong kind of surprise exactly when the action gets busy.
The safest rule is simple: keep the encoder predictable, then spend bitrate only where the picture needs it. If your hardware and destination support it, AV1 or H.265 can deliver more quality per megabit, but I would only use them when the full chain has been tested end to end. For most creators, H.264 still wins on compatibility and fewer moving parts.
- Use CBR for live delivery so the upload pattern stays steady.
- Keep the keyframe interval at 2 seconds unless a platform explicitly tells you otherwise.
- Prefer a hardware encoder if the same machine is also running the game, browser sources, guest calls or a capture-heavy scene.
- Use x264 only when the CPU has real spare headroom and you have tested under full load.
- Stay with progressive scan and Rec.709 for SDR so the stream looks correct on typical displays.
- Keep audio sane at 48 kHz stereo and a moderate bitrate such as 128 kbps unless you actually need more channels.
I also care about presets, but I do not treat the slowest preset as a prize. If the encoder starts to overload, the answer is usually to ease the resolution or move to a faster preset before anything else. A slightly simpler encode that stays stable all night is better than an ambitious one that collapses during the best moment of the stream.
Once the encoder is stable, the platform itself becomes the next constraint.
Platform rules that change the answer
This is where the numbers stop being abstract. Different platforms still reward different trade-offs, and if you ignore that, you end up optimising for a setting that your audience never actually sees well.
| Destination | What I normally aim for | Why it works |
|---|---|---|
| Twitch | 1080p60 at 6000 kbps, CBR, 2-second keyframes | It is a familiar standard for gaming and chat-heavy streams, but dense motion can look cramped, so 936p60 or 720p60 may look cleaner. |
| YouTube Live | 1080p60 around 12 Mbps, 1440p60 around 24 Mbps, 4K60 around 35 Mbps, with 2-second keyframes | There is more room for detail, which helps education, demos and high-motion footage, as long as the upload is genuinely reliable. |
| Multistreaming | Build for the strictest destination first, usually 1080p30 or 720p60 with conservative bitrate | A single generous encode rarely looks equally good everywhere, so I prefer the safest common denominator. |
What matters here is not just the raw number. A cleaner 720p60 feed often looks better than a muddy 1080p60 stream if the motion is complex and the upload is limited. Likewise, a high-resolution encode only helps if the viewer platform can serve it without introducing extra friction. I would rather pick a profile that looks consistent everywhere than win on a spec sheet and lose in the player.
That leads directly into latency, which is really a viewer-experience choice.
Why latency changes the viewer experience
I do not treat latency as a bonus feature. I treat it as a decision about whether the stream should feel conversational or polished. Lower latency makes chat feel immediate, but it reduces the player’s safety buffer. That means it can expose network wobble more quickly, especially if the connection is already close to its limit.
- Normal latency works best when interaction is not the main goal. It gives the player more breathing room and usually the smoothest playback.
- Low latency is a good compromise for Q&A, polls and light interaction. In practice, it often lands at under 10 seconds.
- Ultra-low latency is for real-time conversation. It can get the delay under 5 seconds, but it is the least forgiving when the network gets noisy.
I would choose normal latency for a keynote, lecture, performance or any stream where quality matters more than instant back-and-forth. I would move down to low latency when live chat is part of the experience and the conversation needs to feel alive. Ultra-low latency makes sense for highly interactive formats, but I only use it when the audience truly benefits from that immediacy and I know the line can handle the pressure.
Once that balance is set, the final step is making sure nothing simple is still working against you.
The setup I would lock in before going live
If I were preparing a first proper broadcast, I would build a profile around stability, then test it under realistic conditions. A quiet desktop does not tell you much. A moving scene, live microphone input, browser overlays and a few camera cuts tell you far more about how the stream will behave in front of real viewers.
- Run an upload test at the same time of day you plan to stream, not just when the line is idle.
- Leave 20-30% of your measured upload speed unused so the stream has room to breathe.
- Use Ethernet instead of Wi-Fi whenever possible.
- Send a private test stream for at least 10 minutes with movement, scene changes and microphone peaks.
- Watch for dropped frames, encoder overload and audio drift before you trust the profile.
- Save the working setup as a preset so you are not rebuilding it before every session.
If I had to choose one default for a new creator, it would be a modest 1080p30 or 720p60 profile, CBR, a 2-second keyframe interval and a bitrate the connection can hold comfortably for an hour, not just for a speed test screenshot. From there, I would only increase resolution or frame rate if the stream stays stable, the audio remains clean and the platform can actually benefit from the extra load.
That is usually enough to get from acceptable to professional without chasing specs that the audience will never notice. In live video, consistency beats ambition every time, and the cleanest broadcast is often the one that leaves a little room unused.