An SRT file is the simplest way to move subtitles between editing tools, upload platforms and playback apps, and on a Mac you can build one either by hand or by exporting it from your video workflow. This guide explains the practical parts that matter most: the file structure, the quickest TextEdit method, the usual mistakes, and when a more advanced subtitle tool is worth the switch.
The shortest path is plain text, precise timing and the right extension
- SRT is a plain text subtitle format made of numbered caption blocks, timecodes and text.
- TextEdit on Mac works if you switch the document to plain text before saving.
- The file must end in .srt, not .txt or .rtf.
- Readable captions matter more than dense captions; short lines and clean timing are easier to watch.
- Final Cut Pro and other subtitle tools are better when the project is longer, collaborative or already on a timeline.
What an SRT file actually contains
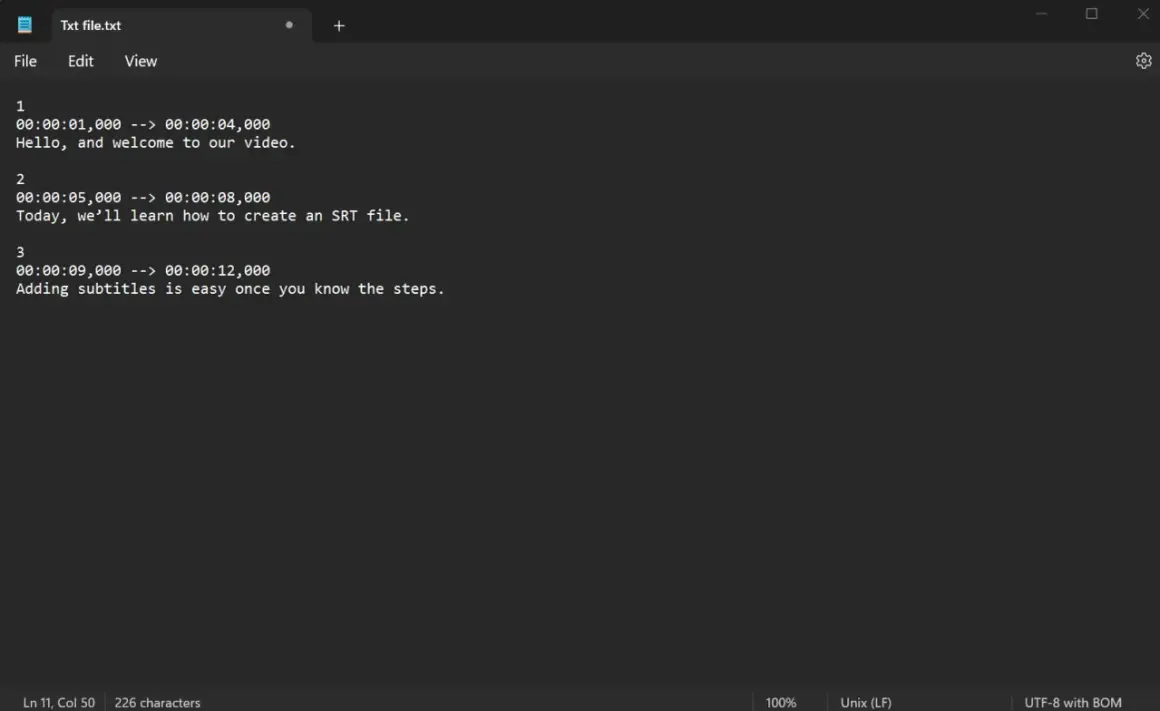
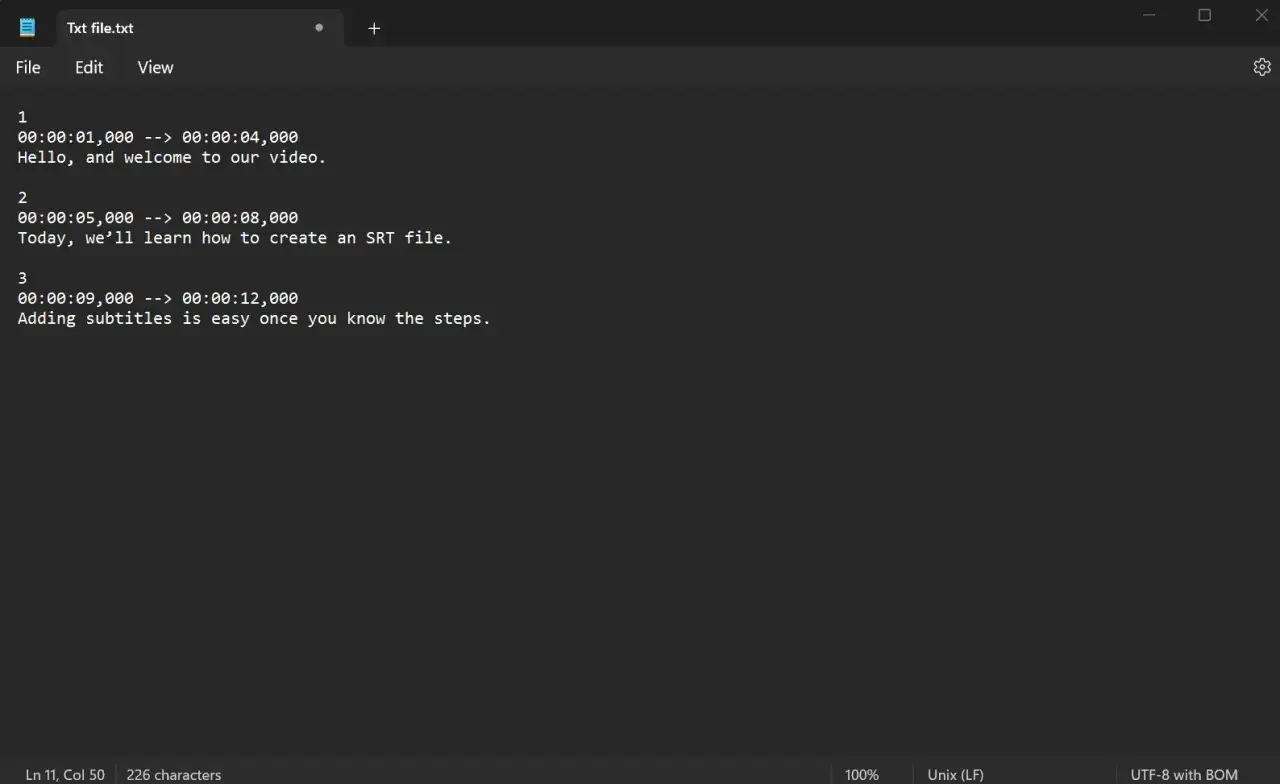
An SRT file is not a special package or a complicated export. It is a sidecar text file with a very simple pattern: a caption number, a start and end timecode, one or more lines of subtitle text, and a blank line before the next block. Apple notes that SRT is straightforward enough to read and edit in a plain text editor, which is exactly why it is still so practical for video work.
Here is the basic structure I use when I want to keep the file clean:
1
00:00:01,000 --> 00:00:03,000
Welcome to the edit.

2
00:00:03,500 --> 00:00:06,000
This file is ready for upload.
The important details are easy to miss the first time: numbers must stay sequential, the timecode line needs the arrow and comma-based milliseconds, and every block needs a blank line after it. Once that pattern is clear, creating the file on a Mac becomes a plain text exercise rather than a formatting puzzle.
That structure is the foundation, so the next step is building the file correctly without accidentally saving the wrong format.
The quickest way to build one in TextEdit
For a short caption file, TextEdit is usually the fastest option because it is already on the Mac and it can save plain text. I use it when I need a simple subtitle sidecar without opening a video editor.
- Open TextEdit and start a new document.
- Switch the document to plain text using Format > Make Plain Text.
- Type the first caption number, then the timecode line in SRT format.
- Add the subtitle text on the next line.
- Press return twice so there is a blank line before the next caption block.
- Repeat the pattern until every subtitle is written.
- Save the file with a name that ends in .srt.
- Check that it did not save as .txt or a rich text file.
I prefer to keep the transcript in one document and the timing in another. That makes it easier to correct wording without touching the whole file every time a timestamp changes.
If TextEdit tries to preserve formatting, stop and convert the document first. A subtitle file should stay text-only, and the moment it starts behaving like a styled document, compatibility gets weaker. Once the file exists, the next question is whether the captions are actually readable on screen.
Keep the captions readable, not just valid
A technically correct SRT file can still be a poor subtitle file if it is too dense or badly timed. The best files are easy to scan at a glance, which matters more than people expect when they are watching on a phone, a laptop or a TV from across the room.
- Keep lines short. A practical ceiling is around 32 characters per line, especially if you want the text to stay comfortable on smaller screens.
- Use no more than two lines per caption unless there is a strong reason to break the rule.
- Split on natural pauses. Do not break a sentence in the middle of a phrase if you can avoid it.
- Match the speech rhythm. Captions that appear too early or linger too long feel awkward even when the text is correct.
- Use sound cues carefully. If you are making SDH-style captions, speaker labels and relevant audio cues help; clutter does not.
- Remember that styling is limited. SRT does not reliably carry rich formatting, so bold and italic text are not something I would depend on.
This is the part where many beginners over-edit the text and under-edit the timing. The subtitle is there to help the viewer follow the video, not to mirror every spoken word with mechanical precision. Once the caption text reads well, the next decision is whether TextEdit is still the right tool for the size of the project.
When a dedicated subtitle tool is the better option
TextEdit is fine for a small job, but it is not designed for timing-heavy work. If the project is long, collaborative or tied to a finished video edit, a subtitle-aware tool is usually faster and safer.
| Method | Best for | Strengths | Limitations |
|---|---|---|---|
| TextEdit | Short subtitle files and quick uploads | Free, built into macOS, easy to edit as plain text | No waveform, no timing assistance, easy to misformat |
| Final Cut Pro or Compressor | Projects already edited on a timeline | Captions stay close to the edit, and SRT can be exported as a sidecar file | More steps, more software, more settings to check |
| Dedicated subtitle editor | Long videos, revisions and multiple languages | Better timing tools, waveform views, hotkeys and quality control | Another app to learn, and some options cost money |
If I am already working in Final Cut Pro, I tend to export captions from the timeline rather than rebuilding them by hand. Apple’s export workflow is useful here because it keeps captions as separate files and lets you strip out formatting that may not survive outside the editor. That matters because the SRT format itself is plain text, so the cleaner the export, the fewer surprises later.
For a one-off clip, TextEdit is usually enough. For anything bigger than that, I would rather use software that understands timing and can reduce manual cleanup. Before you hand the file off, though, it is worth checking the file itself, because most subtitle problems are simple but annoying.
Check the file before you upload it
The easiest way to avoid a broken import is to inspect the file once before you send it anywhere. I always do a quick pass through the raw text, because the mistakes that break subtitles are often invisible at first glance.
-
Confirm the extension. The file should end in
.srt, not.txt,.rtfor a renamed version of another subtitle format. - Check the numbering. Caption blocks should count upward in order without gaps.
-
Check the timecodes. The format should be
hh:mm:ss,mmm --> hh:mm:ss,mmmwith commas for milliseconds. - Check the blank lines. Every caption block needs separation.
- Watch for encoding issues. If accented characters or symbols look wrong, revisit the plain-text encoding instead of retyping the whole file.
- Test the file in the target app. YouTube, Vimeo, Final Cut Pro and similar tools will reveal formatting problems quickly.
One small but important warning: do not rename a WebVTT file to make it look like SRT. The extension is not the format. If a platform specifically asks for VTT, export or convert to VTT properly instead of pretending the file is something it is not. That sort of shortcut usually costs more time later.
Once the file opens cleanly in the destination app and the first minute plays correctly, you know the structure is sound. At that point the workflow becomes less about fixing mistakes and more about choosing the right method for the size of the job.
The workflow I would use when the project needs to scale
For a short clip, I would make the subtitle file in TextEdit, save it as plain text, and double-check the extension. For a larger edit, I would keep the captions tied to the video timeline and export them from the editing app, because that reduces the risk of drift and saves manual timing work.
The practical rule is simple: use the lightest tool that still protects the structure of the file. If the captions are tiny, plain text is enough. If the edit is changing, the team is collaborating or the file will be reused across platforms, a subtitle editor or a timeline-based export is the safer choice.
That is the cleanest way I know to handle SRT files on a Mac: keep the format plain, keep the timing readable and verify the result before delivery. If you do those three things well, the file usually works first time, and that matters more than any extra formatting trick.